Friday, February 25, 2022

Continuing on towards finish line

     So far, these products are taking the place of my usual thread that hold fabric together:


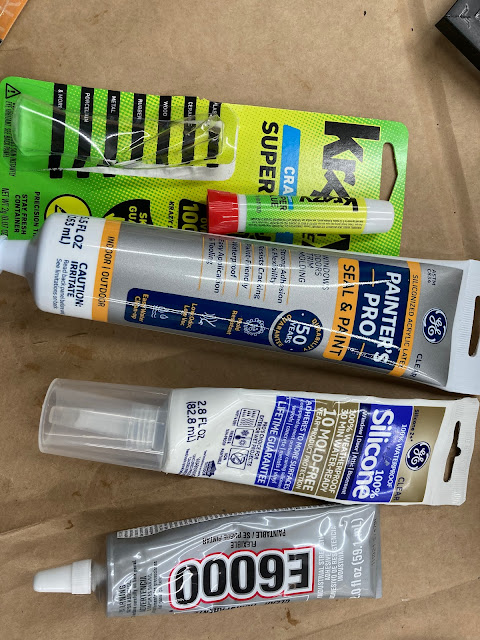
     Silicone to hold the sheet of glass in the frame (wow, what a messy job!), E6000 to hold glass shards on the glass sheet, Krazy glue to hold the hooks on the frame. If anyone knows better products than what I used, feel free to let me know. I prefer thread and fabric.
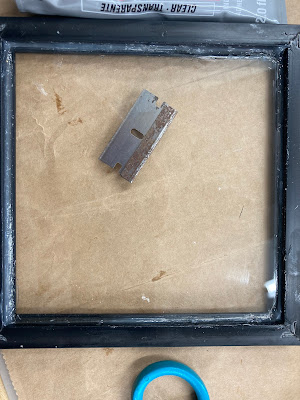
Cleaning up my messy silicone application by razor blade.
     I was able to buy some more frames and glass from the stained glass store (Gleam and Glimmer, https://gleamandglimmer.com/index.php)

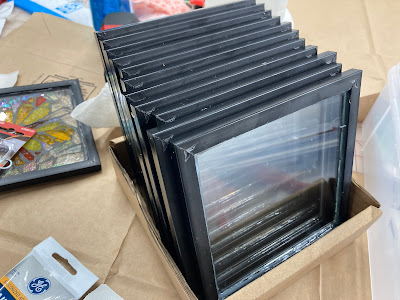
More frames, carboard backs removed, all silicone sealed and cleaned

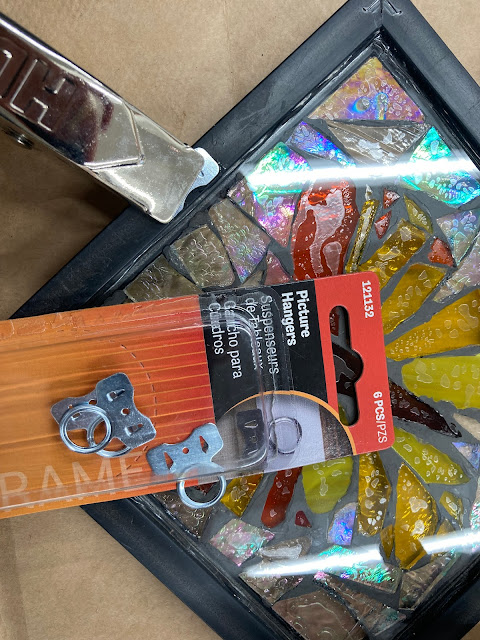
     Tried these hooks, bent the prongs flat, glued with Krazy Glue
and clamped to dry.

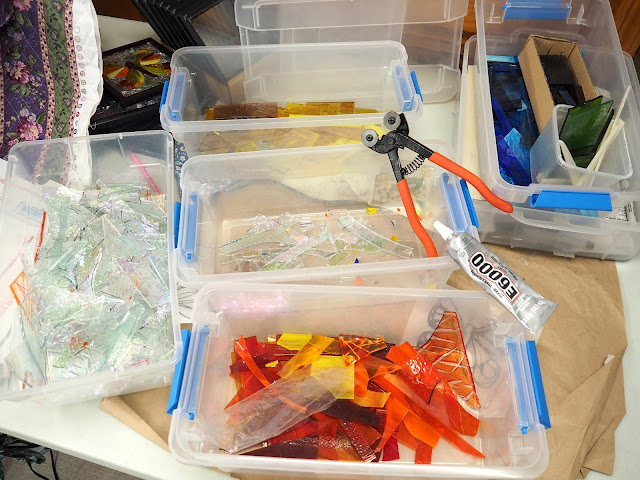
     Also, bought more shards, by the pound, to make more. I put them in plastic boxes to keep the colors sorted. You can see my butterfly sketch under the orange glass box. How about those crazy nippers? Learned to use them and bought a pair.
     Hope you are not bored with this project.


Wednesday, February 23, 2022

Shards, scraps and sourcing

     Part 2 of the creative shard idea birthing. The stained glass mosaics need grouting. Never did that. I read that sanded grout was the way to go. Trips to Home Depot and then Lowe's where I found a 25 lb bag of sanded black grout. Pretty heavy and it was on a high shelf.
     I read directions in a tutorial on stained glass mosaics that said to use a small cup and add the grout and spray water from a spray bottle at the same time until it was mixed but like peanut butter with a spoon. Right. Mess but mixed. Using gloves, the grout was applied to the glass in a clockwise and counterclockwise motion, sat for 10 minutes, then wiped clean with dry paper towels. Right. More mess. I think everything I do, I make messes. You should see my thread and fabric shrapnel.
     These are the first 3 butterflies before and after grouting.

Glued on shards before Grout


After Grout
     Ok, the big idea will work, however, I need to find out how to hang these (what hook on frame and for window, what glue), where to get more framed glass, how to seal the glass in the frame, how to mail- box sizes-, print out Stained Glass lyrics, write a letter to enclose, etc. So now, I have a bigger list to source and solve than just making the mosaic. The rabbit hole grows deeper. To be continued.

Tuesday, February 22, 2022

The twisting, bumpy road of creative thought

     One of things people say to me that drives me crazy is "oh, you are just creative". It sort of assumes you wave a magic wand and rabbits appear out of hats. Creativity, for me, is all about hard work. Sometimes I go kicking and screaming when I get an idea because I know it will be a long, bumpy road with no map.  You don't know whether you can get something out of your head into reality or will it be a dead end. But you have to do it or your head will explode.
    This latest light bulb came after becoming aware of so many quilters that I follow on blogs going through shattering times. I feel helpless to encourage them and share compassion. I had a visual idea jell in my brain with no discernible way to bring it to reality. I thought maybe if I traced its development, it would encourage someone else to keep the fires going.
    Stella Niagara, where we have our guild quilt retreat, has a teeny chapel on the Niagara River. If we get the keys, we can go inside. It has these gorgeous windows that are made from chunks of rich color transparent glass set in black grout. When viewing from inside, the light coming through is magical and glowing. I photographed this during 2021 pandemic time.


     So that was in my head. One of my favorite musicians, Chris Wilson, lost all of his bookings and income during the pandemic and was able to broadcast on Youtube live concerts twice a week, which became a lifeline. One of the songs Chris will sing is called, "Stained Glass" by Jim Shirey. It talks about dashed dreams and shards of glass. If "you take one step back, and let the sun shine past, you won't see shards, you'll see stained glass." You can hear and see Chris sing this if you go to 34 minutes in the video. So that was also in my head.
     As I read of deaths, surgeries, illness, and more in blogs, besides praying, I wanted to do something tangible. I make and send comfort quilts, but these people could make themselves a better quilt than I. 
     One morning I woke up and in my mind was a stained glass butterfly in a window with the sunlight streaming through. Butterflies are profoundly meaningful to me after surviving a heart attack 4 years ago. However, I have never cut a piece of glass nor wanted to. I looked through etsy and Pinterest and found that stained glass mosaics might be an answer. It had to be small as I have to mail these. It had to be held together by a frame of sort and have a hanger attached to hang on a window. I could find nothing like that.
     I wrote my idea to Vicki, who is a quilter, dyer, makes glass items and has done mosaics, asking for some help. Vicki directed me to some tutorials/videos that I viewed. She also sent me a box of glass scraps!
     I went to a local stained glass shop and brought my sketches, pictures and idea to the owner who gives workshops. I took an open studio workshop with her and she showed me how to nip shards of glass, gave me a 5 x 5 frame with clear glass, and how to glue the shards down. She recommended shards of clear iridescent glass for the background. She could not give me any help with grouting as she uses resin over the glass. I left with a butterfly glued on the glass and a new tool to nip the glass. More to continue.


Sunday, February 20, 2022

Small 30s quilt off longarm

      Yesterday, I finished a smallish comfort quilt that I put together from some small squares of 30s fabric someone donated to me. There was not enough squares for a big quilt, so I set the blocks on point with cream squares between them and white triangle for the row endings. I had this great periwinkle print I had bought to use as a border in my stash. I wanted it longer since it will be a comfort quilt, so I added the cream with tiny flowers, which are exactly the same color as the border. Here is the original post where the quilt is just pieced. I thought about each area and the quilt told me what it wanted. I love the quilting even though it is not perfect. When it is bound, I will show the back.
      I took the quilt off the longarm, trimmed it, laid it on the family room floor and went to get my camera in the next room. In the few seconds I was gone, Tugger woke up and went and plopped himself on the quilt. He has a sixth sense for knowing when a new quilt is done. He only chooses the new ones to lay on.

     I have a normal looking Cape Cod style house, but we added an addition opening up one back bedroom into a kitchen and out to a dining area and family room. At the end of the family room, we had regular Anderson windows screwed together to make this window wall with the cathedral ceiling. It just snowed yesterday after mostly melting, so the windows are a picture frame to the outdoors. The floor where I took the quilt photo is in front of the windows. I took the photo from the bedroom upstairs looking down (have a glass door that opens to see the family room- has a railing across, don't worry). I love stained glass, but don't do it. My husband made the lowest one in a workshop. Christmas cactus and amaryllis at bottom.


Friday, February 18, 2022

Violet quilt border wrangling

      My friend sent me a pin of a border that resembled a ribbon. I used graph paper and figured out a block that would finish at 4". The pin only had a section of it, not how it turned corners. Soon, I realized I was in trouble in the corners. I tried to use a HST of white and the light purple batik (Cairo), but the upper left corner looked awful. I tried the dark batik used in the border, but looked like holes.
     I looked at some butterfly patterns I had and found one I used to make a bunch of blocks (21) that are still not sewed into something. That block was 6 x 7. I tried to use a proportion wheel to find out what sizes I needed to cut the pieces. Trial 1 was a fail- too small. Trial 2 needed to have thin borders sewn around it to fit. Then I made three more. Those little blocks are a real trip to sew.


     The backing is sewn and as soon as I get the quilt that is on the longarm done, this one is going to be next.
     By the way, I had a hard time finding the right light purple batik for the border. I searched everywhere and found this one, Cairo, on Batiks Plus. I ordered two different light purples (Orchid) and Cairo was the winner. I had never ordered from them, but was very happy with their service. They put each yard of batik in a plastic bag that was labeled on the bag and on the fabric. They also included a free fat quarter of batik and shipped timely. I had to pay a premium for Cairo because it is a discontinued fabric, but it was the right color.
     As is my practice, I browsed the clearance section and found a Hoffman digital floral print I had admired years ago for $5 a yard! I bought enough for 8 repeats for a One block Wonder octagon design.

Thursday, February 17, 2022

Old and new bursts

      One of the most used items in my studio is my iron. In my sewing studio, I have a Panasonic cordless iron that has served faithfully over years. It has a stainless steel plate. I never put water in it. In the longarm room, the other iron is a EuroPro steam iron that has a boiler inside and I used it for backings, big wrinkles, and to block pieces to trim.

     You can imagine my shock and surprise when I lifted the iron off the charging station to press and this broken burst happened suddenly.
     I tried using my husband's iron (he irons his shirts, I only iron fabric), but it was so large and clunky that I had to bite the bullet and buy another one. The new one has a ceramic plate and is a showy red. Despite the box showing up trashed at my door, the iron is working great except I think they made the automatic shut off even shorter.
     On a beautiful bursting note, I bought a bunch of amaryllis bulbs as presents for Christmas. Uncharacteristically, I kept one box. I had never grown one before  as they always seemed kind of chunky to me. I have a ton of plants in the house- especially Christmas cactus . I know Wanda adores amaryllis, so I gave it a try.
The first single bloom

All blooms opening


Tuesday, February 15, 2022

Violet's quilt

     My granddaughter is 3 months old now. I did a quick panel type baby quilt when she was born, but was planning on using these improv birds and butterflies made by following Lynne's patterns that I bought. Making improv is not easy as you would think. I could not get the butterflies to be reliably the way I wanted them and gave up and used what I had or else Violet would be six by the time I would be done.
     I laid them out how I wanted them and then had to figure how to add the extra pieces to pull it all together. I used varieties of White on whites (WOW). Math is not my strong suit. I made sure I had a new rotary blade.
     I also used the alphabet tutorial from Lynne to make the letters. Many bad e's were made.


     I had thought of making a border of Half Square Rectangles. But either using white or colors, it did not work well. I then tried skinny random sized piano keys, did not look good either. I asked for help and a friend sent some ideas. Next time I will show the solution.

Sunday, February 13, 2022

Valentine crazies

      I have missed posting because of overload in my mind and studio. I have more ideas and plans than cranial space and 24 hour space. If only I did not have to sleep. Actually, I need more sleep as I have been waking up after 4 hours and unable to meaning I am a zombie by 3 pm.
     Tomorrow is Valentines Day and I am relieved I could get all the cards made and sent out. There is always a point I don't think I will make it. What seems like a good idea to make ends up being more work than I figured when you multiply it by 70. I am glad I had lots of small red and pink scraps and scrap batting.

Untrimmed, unironed blocks waiting for backing and batting

At this point, the blocks are sewn with batting and backing, turned inside out, either big stitch hand sewing or machine decorative stitich sewn

     After sewing the blocks and trimming them, they have to get a batting, backing, turned right side out, stitched around the heart, glued to a color paper and then card (Aleene's Fast Grab Tacky Glue), the inside stamped and written, the address labels printed out (forgot what program and had to relearn it), adhered, stamps and return address labels on, and taken to the Post Office. Piece of cake. Right.
     A good friend gave me a Pfaff Passport 2.0 with all these decorative stitches on it. I only have vintage machines, mostly straight stitchers, a couple of zigzaggers. She was looking to downsize and I enabled her. I started with big stitch hand quilting, but quickly changed over to the machine. My hand sewing is pathetic. Some of you may have received a hand sewn one. Try to think of it as rustic flavor.