Sunday, December 31, 2017

The magic crispness of cold and ice

     Many family members and acquaintances loudly and continually disparaged the climate we grew up in and moan and complain about the s word- snow. How can you live there? Why would you want to put up with it? It is so much better in _____ (warm climate). Ok, I don't love grey slush and sleet or the last dregs of winter, but I can't throw it all away. I am miserable in heat and humidity and hate big bugs. I like to visit, but I love my part of the world. It is not perfect, sometimes trying, but then sometimes downright magical.
      For a couple of days between Christmas and New Years, my husband and I go away to recharge at Niagara-on-the-Lake, a quaint historical town, (that is moving a bit too upscale due to its proximity to Toronto), where the Niagara River meets Lake Ontario. For 20 years we have visited this time of year and it is always different. We love to walk the streets and gaze at the cozy houses and yards. More megamansions lately, but the beautiful architecture is still there. There is a little downtown strip of shops and restaurants. This year, it was very cold temps and lots of lake effect snow showers. Lake effect is a phenomenon where the arctic winds pick up moisture from the warmer water (most the Great Lakes) and deposit it on shore. In the summer, it is lake effect rain. It travels in bands- sometimes narrow or wide, and can stall leaving big amounts behind. That is what happened in Erie, PA on Christmas. 
     Across the river is Fort Niagara, a United States historical site. I am not a professional photographer by any stretch, but I was able to capture the icy briskness and the crystal clear magic of a winter day. I did not edit or crop the photos, just took them in wonder. Enjoy.

Gazebo at the Park
Lake effect coming in from the right


Lake Effect wall of clouds forming over Lake Ontario


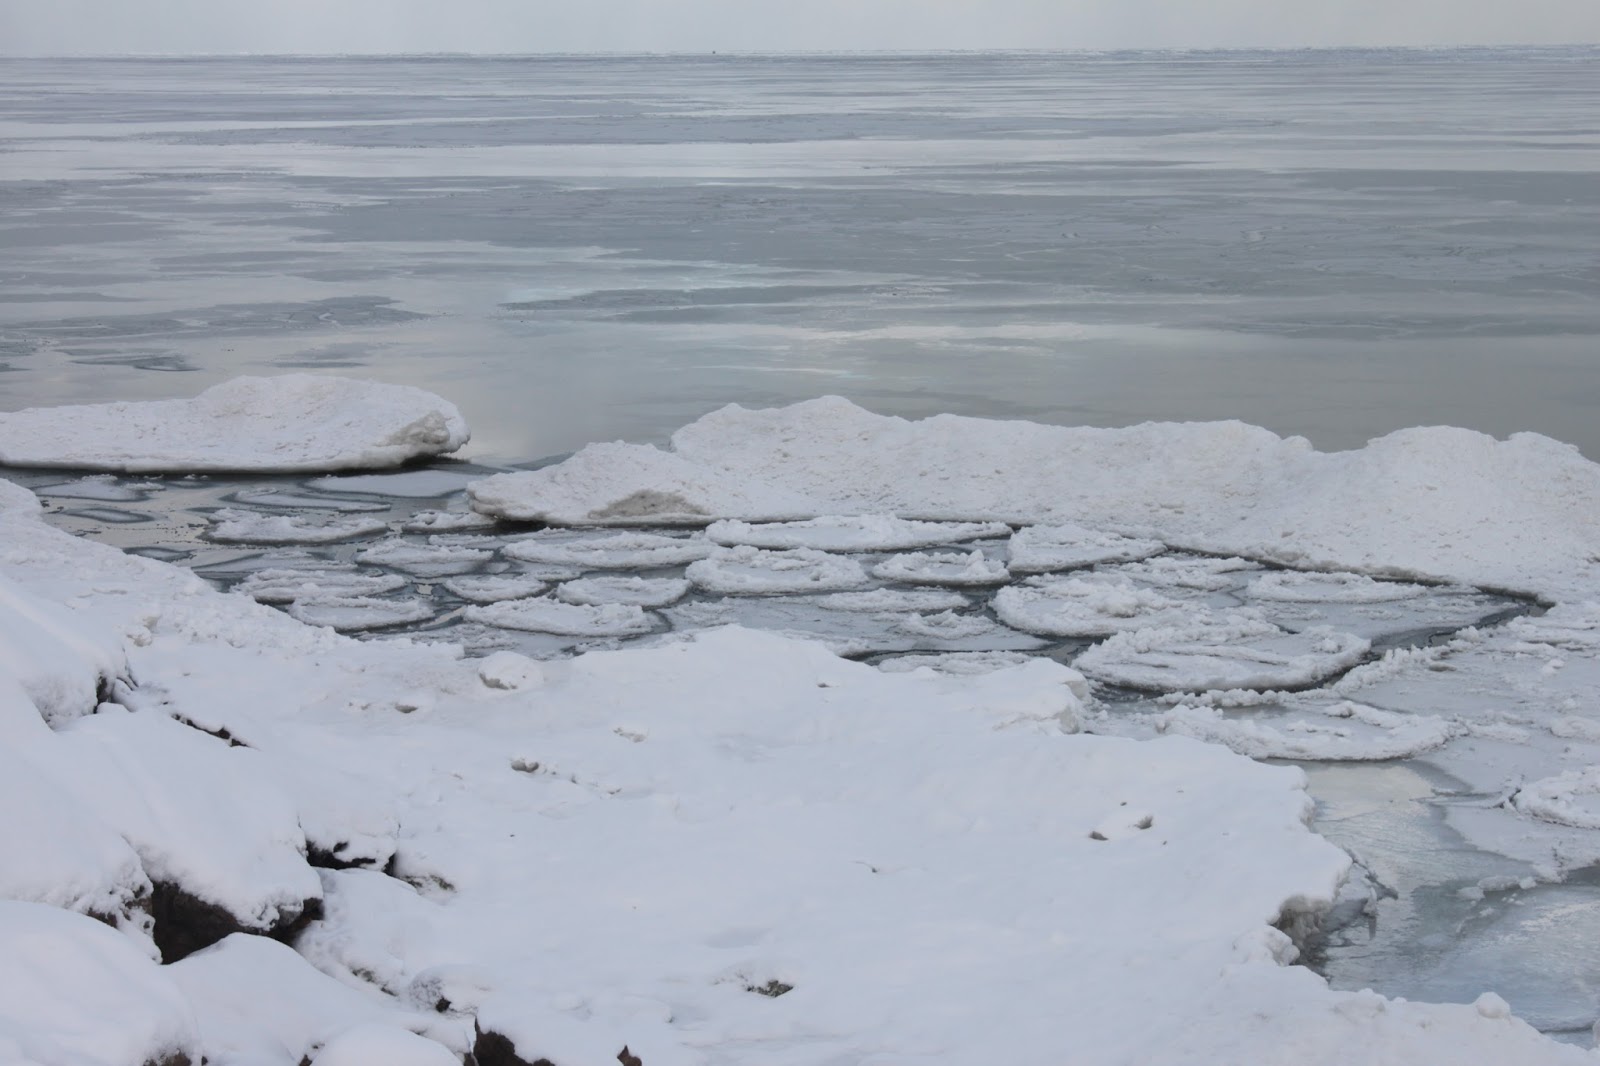
Ice chunks off the shore


Saturday, December 30, 2017

Finally found its home

     My granddaughter's quilt that she laid out and chose all fabrics was completed and wrapped, but due to their busy schedule, I finally got it delivered it today. She told me it was so good on both sides, that she was going to use both. She also looked at all the different quilt designs and loved discovering where they changed. I had washed it last, so it was puffy now. She said how do you get the puffy in? I answered, it was there all along, just needed water to get it out. She said ok. So, it is with Jolene now making her cozy.


Monday, December 25, 2017

Merry Christmas from Snowy Buffalo with a star!

     My grandson keep wishing and moaning about having a white Christmas. Wish granted. We have not had one for about 5 years. So, Tugger is celebrating under the tree. Can you believe this quilter does not own a tree skirt? Maybe this photo will shame me into making one.
     Jolene's quilt that she laid out is all sewn, quilted and ready to give. It seems appropriate that it has a star. I had a hard time choosing binding, but decided on a pink with green polka dots. She chose the Easter egg fabric and the bunny strip. It just came out of the dryer with the last two shots. Maybe she will let me take a photo of her with it when she opens it. You never know.
     Merry Christmas to all my wonderful and appreciated readers!!


Saturday, December 23, 2017

All delivered and scattered

      Every year I make my Christmas cards (an birthday cards, etc.) I could not get a good fabric idea in my head. I no longer silk screen. The idea I got in my head from an old Latin Hymn, "Creator of the Stars of Night" inspired an image, but the only way I knew to get it out of my head was to paint it. I knew if I painted it, I would have to paint many for all the cards I give. I tried one year to copy my painting and put it on the card, but the painting's effect did not translate well. So, I painted 100. 
     First, I had to use masking fluid with a brush to save the white paper for the star. Then I painted it, put kosher salt in the sky, let it dry, and rubbed the masking fluid off each card, double stick taped it to the cardstock and glued the hymn on the inside. I was very happy with the card and I have received very positive feedback. I used Arches 90 lb cold press paper and Winsor and Newton watercolors. Vicki posted a photo of the one I sent her on her blog. Thanks!

All spread out when done

Variations in the paintings

Saturday, December 16, 2017

Trying the stars in Inklingo

     I came across Inklingo a couple of times over the years, but did not have the focus to go through all the webpages to figure it out. Motivated by possibly making Passacaglia by not using English Paper Piecing (I can hardly look at the words), I found Inklingo again. It tried the free shapes and made the two stars. I was able to machine piece them. The yellow fabric was sent to me by Linda from Inklingo printed. I then printed on the white with black. Easy to print. I bought the Handbook. Now I have to decide whether to buy some more diamonds to make stars or take the plunge with Passacaglia and the Millifiori book. Will I be able to handsew (so I can have some portable sewing) or do I stick to machine sewing only?

Friday, December 15, 2017

Straightening it out

     I am helping a woman get back on track with quilt blocks that have been in a bag for years. When I put them up on my design wall, it took a while to figure out it was two quilts set on point. Don't ask how long that took me. I am patient when I am working on my own quilts, otherwise, not so much. Character flaw. One of many.
     Then, to make sure no one would have to go through that again, I sewed one up and put numbers on every block and row on the the sewn one and laid out the other, numbered it correspondingly for her to sew. Then, I packed up the whole shebang and gave it back. I told her a border would be in order. Another one out the door.
Back months and months ago without sashing. I had cut the sashing for her and she attached it.
2nd one laid out, keyed numbers
Quilt No. 1 sewn. Oh, figuring those corner triangles!
All labeled to act as a key for the other quilt

Thursday, December 14, 2017

Winter Wonderland- Enjoy!

     I know it is cold. I know it is gray a lot and sloppy sometimes. I know driving is iffy at times. So what. What could be better than going to cut down the family Christmas tree at a tree farm in the hills south of Buffalo with 2 grandkids who love to throw themselves around in the snow? Hmm, nothing. So, I will let you in on it.
Ahh, fresh powder snow!
My snow angel is the best!
Finally one that Grandma approves of
Papa, I don't think you two are cutting it straight
Can you say "Timber"?
Making the long trek back to the car!
One more flop in the snow to make sure we are totally soaked and frozen.

Saturday, December 9, 2017

Painted Quilt Tribute

     Ever since I saw the photo of Wanda on her blog, I knew I needed to paint it as a tribute. I knew it needed some of her quilts in it. It took a lot of time, thought, and "piecing", but I am very pleased with the tribute to Wanda- one of the greatest influences and star of my quilting life.  It is watercolor about 11 x 14. I hope I don't have to watermark it to keep it from being pirated.
     Thanks for looking at my "quilts". I notice a thread on the painting after it was all cropped and all. I will have to reshoot it when the sun comes out.


Saturday, December 2, 2017

Kevin's Mystery sewn up

     I finally finished Kevin's mystery quilt, Sapphire Stars.  I made some changes to the original. I did not use the gray lattice, but opted for light blue. I changed the border so the piano keys ran all the way across and top to bottom. I was surprised how large it was. 
     I waited for a sunny day (Friday) and hauled my photo stand outdoors and set the quilt up. First, the bar had to go so high, it got tangled in the oak tree. Next, the breeze came up and knocked it over in different directions. I am sure the worker guys finishing up my husband's garage addition were laughing it up inside the garage. Hope they did not video it and put it on youtube. 
     Parts of the quilt were challenging, especially the yellow and blue triangles that had the blue strip in it. I think I would make them solid next time so the star where the blocks meet would be more prominent. I am so glad I finished. Thanks, Kevin for the experience!

Pineapple Blossom has bloomed!

     In October, I took 2 days of classes with Bonnie Hunter in Rochester, NY. One of the quilts was Pineapple Blossom, a free one on her blog. Even though it was the smaller quilt in her directions, I decided to add the "waste" HSTs for the border. I had to make a couple more. I did not realize until too late, that the quilt is not symmetrical top to bottom, so I did not sew the HST border in the right direction and ended up with yucky corners. Sigh. So, I ripped out the corner ones and replaced it with a whole neutral square- 4 corners worth. Fiddly stuff. 
Bad HST corners
Corners with squares auditioned, yes, ripping commence
     After straightening that out, I tried a whole chorus of border fabric- blues, greens, purples- and settled on a fabric I had just bought last week on clearance at a Black Friday Sale at a LQS. It says meow all over on it, kind of funny. I made all the meow words face up looking from the center. Once it was on the wall, I really, really like it- everything was scraps. Then I wished I would have made it larger, so maybe I will make another one. Very fun quilt!
Some border choices

Finished top

Friday, December 1, 2017

Painting Memories

     Besides being a quilter, I am also a watercolor painter. I keep going to classes to push myself further, and hopefully, improve. I love to paint flowers, landscapes and people in just the right pose and mood. I persuaded (bribed) my granddaughter, Jolene, to sit for this photo. I wanted to contrast her youth with the vintage machine and quilting melding them with a sense of creative joy. Watercolor paintings are hard to photo because of all the subtleness, but here she is- Jolene and the Singer 15 Tiffany decal parlor cabinet treadle.

Tuesday, November 28, 2017

No scrap is safe!

     I have always loved the Scrappy Trips from Bonnie Hunter, a free pattern on her blog. I combed (ransacked) through all my strip bins for 18" x 2.5" strips. Six are needed per block and I need 30 blocks. I did not cut up WOF 2.5" strips, but used partial ones and I had to process more scraps that are in bags under my longarm just waiting to be liberated. This quilt certainly chews through lots of fabric scraps.
     I arranged the 6 strips and pinned them at the top in order of left to right. I made 2 extra sets (things happen). I stacked them in a plastic bin for safety from the cat, who likes to ransack strips. Finally, I was able to make 2 blocks to see how it looks. Only a bit of ripping, ironing seam direction is real important.


Trimming up, stacking up, go!

     When I first started quilting, I did not know (care) about trimming blocks when putting them together. The patterns I used did not mention it. However, after wrestling fabric into a top and losing, I started trimming. For HSTs, the Bloc Locs were wonderful. For squares, the Stripology Ruler makes it work. I am on the last round for another exploding squares quilt. I started with 4" squares. The last squares is 8".  I trimmed every sewn square before I put on another square. 
     My mom can sew the 4 edges, but I cut them open and trim and layer. I use washable Elmers glue in the 4 corners to hold the layers so there are no pins and so my speed demon mother cannot get them out of whack in the corners (I keep saying they are FEED dogs, not PUSH dogs to no avail).
     Anyways, I gave her the last round on Thanksgiving and you can see the slight slivers of fabric left which make a huge difference when I sew the blocks together (will need another last trim).


Wednesday, November 22, 2017

Some finishes

     I completed my Christmas present pillowcases at the retreat and this week made significant progress on Sapphire Stars. I have to put a 2.5" navy border around the body and then attach the piano keys that are already sewn. I made some changes to the pattern so the piano keys attach to all sides instead of an awkward navy blue rectangle at the corners. You will see what I mean later.


Tuesday, November 21, 2017

Always keep learning

     Our guild sponsored a 2 days of classes with Karen Kay Buckley,  http://www.karenkaybuckley.com/index.php. We split her time with other guilds so we could split her expenses. The two other guilds had lectures and classes. I am not much into applique, mostly because my hand sewing is, um, lacking skill and I hate fusibles. Karen does not use fusible. She taught a machine applique class, Kansas Rose, and a hand one, Modern Dahlia. If you ever get a chance to see her, she is an excellent, superb, teacher. I did not finish either project and I will finish the hand one by machine.
   She taught us by using a heat resistant plastic called Templar and Magic Sizing painted on the seam allowance, to turn under the edges so the piece can be sewn on. In the machine applique class, we used clear YLI thread and a blindstitch at 8 stitch bites per inch to secure and I think it looks great. I laughed and laughed at the size of the needle and eye. In my wildest dreams, I don't think I could hand sew an entire block at 8 hand stitches an inch with this needle. 
   I have some other projects to finish before I get to these.
Leaves, stems and flower machine appliqued down with YLI clear

Ha, ha, tiny needle. My attempt at hand applique.

Both projects in process with fabric selection. I have excellent directions from Karen to finish.