Wednesday, January 30, 2019

Think about your rulers

    I just finished a presentation on my guild on being Ruler Smart. I still have to put all the stuff away, yikes. The idea is- be smart about what rulers you buy, why you buy them, and how could they be used in a way to be quicker and more accurate. I have made my share of mistakes, and I have also bettered my craft.
    One example that I just discovered is how to improve the normal technique for cutting Double Pinwheels. A while back, I found this excellent tutorial using strips. I made a sample and stuck it aside. When working on the presentation, it dawned on me that I could use the Easy Angle Ruler to do a quicker, more accurate job.
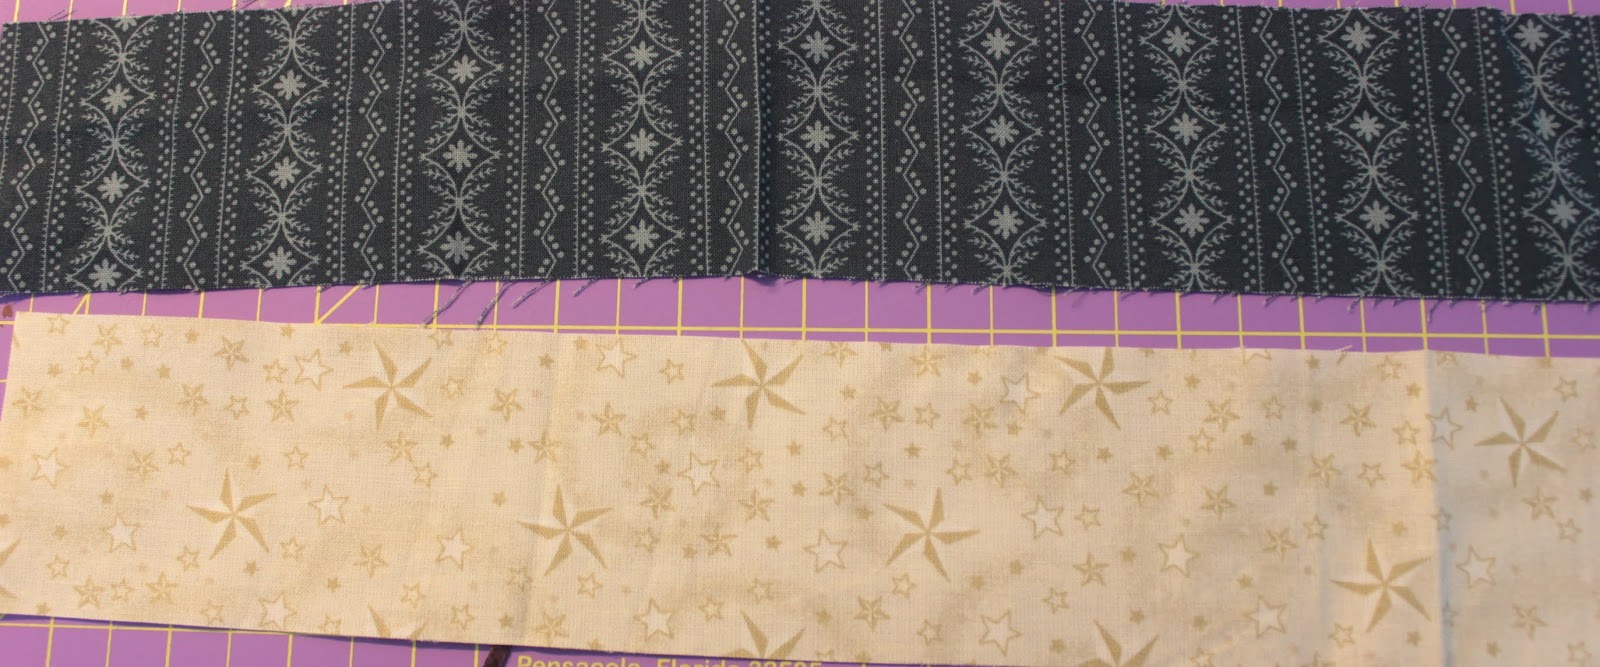
    I started the same way, seaming two strips and pressing to the dark.


Strips nested on top, opposite values.
     But then, instead of cutting into squares, and drawing a line diagonally, sewing 1/4" away both sides of the line which I find hard to mark, sew without a guide, and not have those seams rocking on me, I took the ruler and cut the two together, flipping the ruler down the strip. One edge is blunted, making it easier to sew, handle, and keep a consistent 1/4". The whole nested strip set is cut.
Done with the EZ angle ruler.
I drew pencil lines to show you where I was going to cut. This one is with Bonnie Hunter's ruler- either one works.
     The results are very accurate with little or no trimming.

     So, remember be Ruler Smart, and you can discover a better way to get where you want.

Tuesday, January 29, 2019

Moved from one quilt to another

     In my organization quest, I took fabric cut and part of a Judy Niemeyer quilt that I pulled the plug on and reassigned it after reading Sarah's post about her new effort, Rockin' Rectangles. I loved the quilt with the blue rectangles, a little way down. So, along with what was already cut, I added some more rectangles (2.5" x 6.5"), and auditioned a bunch of backgrounds.
     My goal was to have the background not stand out above the other strips, but not to be shoved in the back like it was pinned a white design wall. I tried all sorts of fabrics.


Narrowed down to three
Down to two.
      I don't usually pick a dark background, but with these batik colors, the darker gray seemed to brighten them and almost make them float instead of looking like blank space.
     I cut the background gray rectangles, put all fabric together with graph paper and Sarah's inspiration, and bagged it. It will be a good project when I just have some time or need to mindlessly sew.
 

Sunday, January 27, 2019

The Colorwash, Quilted and Bound

     Last week was a very difficult week for me. I was depressed and grieving over the situation here in NY. I am not a political person, but the line between life and death and the sacredness of human life is very clear. I could not function to sew. I won't elaborate, but to help pull me out of despair and mourning, I took out my Colorwash that I did in an online class with Wanda and quilted it on my Singer 301. 
     I used pencils especially made for marking fabric and I fear not all of it is coming out. I do not use markers for that reason. I will work on them with a wet towel again. 
     The idea for quilting was to be a burst, but not continuous from the center because that is the way the light moves in value. I chose two rectangle demarcations to stop and start the lines. 
     To start with, I used Invisfil to quilt with Bottom Line in the bobbin. Invisfil was recommended for quilting very finely. I bought an assortment in Houston. It is very thin. I could not get it to work. I tried a spool holder, running it through a paper clip, on the machine, and it kept breaking and not playing nice on the fabric. 
     I put Glide in the machine and it worked well, but I don't have all the colors I need to work over all the areas and it shows. I use Glide in my longarm and have cones of mostly neutral colors. Then it dawned on me to try the monofilament from YLI that has worked so well for me. I put it in, used PremoSoft in the bobbin and it worked like a charm. I was able to finish the quilt.
      The whole quilt was pressed well and then trimmed square. When I was Houston, I took a class from David Taylor, excellent appliquer and quilter. He showed how he used 1/4" Polyester twill tape sewn around the edges of his piece to stabilize the edges so it would lay perfectly flat, no waving. He cuts the sizes exactly as measured down the middle. Unfortunately, I can find it nowhere except in 4 yard packages which means you need a lot of packages and try to piece it. I sewed the longer sides first and then the top and bottom. Holy cow, does it lay flat!
Twill around edges. I used straight stitch. Could do a zig zag, but I did not think to switch machines.
All around the whole quilt
     I had to go back to the lesson, because I almost used facing, but realized it was to have a binding. In my new organization, I found some fabric pronto and cut and pressed the binding. I even remembered to sew the sleeve into the top binding. No problem sewing through the twill tape.


Detail of center
     So, although I have to handsew the sleeve down, and try to remove the markings, the Colorwash is done!! And I love it, and I am keeping it. And I want to make another. Thank you, Wanda!
      I have lots of little stuff I am trying to work on, but this helped me immensely. Thanks for looking!

Sunday, January 20, 2019

Sunk money and breaking free

     Since Jan. 1st, I continue to reflect how to break out of my usual way of working and move ahead in quilting. I spent a few weeks totally reorganizing my fabric in a sane, easy to use format. Except for scraps, I finished the job. I think it will be easier for me to find, select, and put away fabric instead of the difficulty lifting boxes all the time and cramming stuff in.
     I evaluated projects that are unfinished. It does not bother me that I have unfinished ones, but it does beg why some are not done over a long period of time. I found that some have stalled because: I don't know how to resolve the problem that came up, some I hate the process and monotony, and some I forgot about. The hate projects are both Judy Niemeyer paper piecing- one is Sea Urchin, and one Harvest Dawn. Someone I know started me on Sea Urchin. I still love the fabric, but the process is torture for me. I bought Harvest Dawn because it is easier and I thought completing it would make sewing Sea Urchin more attractive. Stupidity. 
    As I was sitting with my head in my hands, my husband came into the studio and saw me. When I told him why, he said the projects were already purchased and to consider it sunk money and get rid of them. I started with Harvest Dawn. I took all the fabric out of the numbered bags and tossed all the cut pieces from the #3 pattern pack. Then I pulled all the fabric together and sorted what was useable. I had off white pieces, WOF batiks and 2 1/2 x 6 1/2" batiks. Two Charm Element kits, #4 and #5 unused. I stored the off whites, paired all the WOF strips and added 18 more to make a 2 x 4 quilt kit, and found a scrap pattern from Sarah that I can use for the short strips with modifications. 
Only finished blocks
Off Whites reclaimed
Paired WOF batik strips plus 18 more
Short strips, 2 1/2" x 6 1/2"
The discards
     If anyone wants the Harvest Dawn pattern or the two unused Charm Element Packs 4 & 5, I will send them to you or I am trashing them.

    I felt a load lift. On Monday night, I have a big presentation to my guild on using/demo different kinds of rulers, and after that I will tackle/pull apart Sea Urchin. If anyone wants the pattern and fabric, I will give/send it them or else I will see what I can selvage. I don't remember how far I got and where I was which is the problem for me with her patterns. Love the look of them, can't do them. 
     Next, I need to solve the problem projects.

Monday, January 14, 2019

Striving to organize and simplify

     Last week, I pulled all the fabric out of plastic boxes and reorganized it. All less than a yard went into cupboards that I emptied, up to 2 1/2 yds went into a bookcase I reclaimed from the basement, the wire shelves went into my husband's shop, the batiks were organized by color on their shelves, the trays went in a small closet with other precuts and all the precut strips and squares are under my cutting counter.
     The batik scrap baskets are a mess and the bags of scraps are in the garage buried by my son's family furniture due to their ongoing remodeling and addition.  I have a mountain of empty plastic storage boxes. The before post is here.
      I am happy with the fabric organizing because I can see what I have without opening and lifting lots of boxes. I am unhappy with the scrap storage. 
     I put the Accuquilt dies on a metal shelf in the basement next to the longarm that has my thread boxes on it. I will move the Accuquilt out of the fabric room on top of my flat file storage also down there. Where it is now is awkard to use it and get to. 
     All the large yardage pieces are jammed in the guest room closet. I need a second low rod installed to try and hang this fabric. Unquilted tops on hangers are on the top rod.
     I wish I had it all done and did not have to monkey around with it anymore. Sigh. I believe this will help me in planning and making quilts easier.
Batiks by color. Hand dyes are the middle bottom shelf. Have to figure some quilts with them.
Reclaimed bookcase, 2 boxes on top with whites and solids. All by color and type.
Full cupboard with collections, Kaffes on top, texts, grays, florals.
By color, 2 cupboard shelves

Middle cupboard shelf- landscape fabrics and odd to classify
Pre-cut boxes, not ideal place but neat once I file the strips on top.

Slim closet in sewing room, precut small squares, trays, extra binding strips, etc.
The awful messy batik scrap baskets, Yikes!


Sunday, January 13, 2019

One down quilted, a zillion more to go!

     I was able to finish quilting an exploding squares comfort quilt, first of the year. I had cut the backing wrong and had to add a strip to make it fit. I had an extra block, so I used that also. 
     There is a woman in my guild who loathes pieced backs and I felt my heart sink when I knew I was going to present this at a meeting. But then, I thought, well it is like a modern quilt and so I will call it a reversible quilt and have a traditional and modern side and that is what I did. She still hated the back, but I felt wonderful about it. 
Traditional side
Calling it a Modern Quilt, not a backing

Sunday, January 6, 2019

Fabric, fabric, everywhere and somewhere

     The first thing I decided to tackle was to rearrange/organize my fabrics. All fabric under a yard were in plastic shoe box sides with locking lids. I took some fabrics out and folded it so it could beput in a cupboard I emptied. I like being able to see all the selection at once, much better than folded and/or stuffed in the plastic boxes. 
     Then I decided to empty more boxes and put the fabric directly on the shelving the boxes were stacked on. I will have to get some other kind of unit, as the shelving has no sides and the bottoms aren't flat, but the fabric is so much more retrievable and visible. The plastic boxes were not the solution as I thought.
The fabric stacks are much more useable than the ones in the boxes, right?
The bigger boxes hold up to 2 yard pieces. I emptied out the black,
whites and gray which look better. Over two yards are piled in a closet waiting for some rods to hang them on.

So now I have all these plastic boxes to contend with plus the others not emptied.
This is how all my batiks are stored, and they need to be freed also I think, but where?
      Now, these are my scrap piece batik baskets by color, yikes, a mess unto themselves, what to do?


Saturday, January 5, 2019

First Sewn

     Although I am still puzzling through the New Year Goals and Plans and trying to rearrange, I enjoyed sewing this Plus or One Block Cross quilt together. The body of it was sewn by webbing and the border was done by sewing the charm blocks on two opposing sides to a cream, and then cutting it down the middle. I cut the corner blocks as I had a bit of that fabric set aside. 
    It is not my color scheme, but I like the fabrics. I think this will make a fine comfort quilt. One resolution for this year for sure- no buying any more charm packs as I hate pinked edges.


Tuesday, January 1, 2019

Happy Restart Day 2019!

     Today is a day we can look back and ahead and to today. Even though it is just a calendar date, we are time bound creatures. It does a world of good to reflect and evaluate. If we have wisdom and discernment, we can get a good map of where we are, how we got to it, and where we can plan to go. 
     I have number issues with my brain, so I don't keep track of yards of fabric, number of quilts, etc. I have a hard enough time with my checkbook. So, I am looking over my blog photos, my UFOs, my fabric, and what consistently trips me up. Somethings are out of my control, like health or family issues, and others need to be reckoned with so they don't suck the life out of me.
    First of all, I am so grateful for the blog friends who stick with me and keep their own blog going. You give me the push to keep at it. You are great inspirations. Particulary, Wanda, Sarah, Debbie, Kevin, Maureen, Vicki, Julie, JulieBonnie , https://alefthandedquilter.blogspot.com/ and many more that I read regularly, but those mentioned above have given me so much to be grateful for, necessary feedback, and teaching. Thank you!
    I cannot come up with a whole 2019 plan today like many- it will take me a couple more days. However, I started with something concrete. I cleaned out a cupboard that I used to store yarn in (given most of it away but for those two bins and they will be moved) and arranged collected fabric according to project. All the text fabric is gathered although not sure what to make. All the OBW fabric together, etc. All florals on are the bottom right. The Kaffe will go where the baskets are. I can easily see at glance what I have. Currently, the rest of my fabric is stuffed into clear plastic boxes on shelving and needs changing. 
      In cleaning out the cupboard I found 4 charm packs of Amy Ellis' Modern Neutrals that I have been hoarding- saving. I took action, ripped off the bands and arranged them into a Plus Quilt or a One block cross pattern. Unfortunately, some prints only had one per pack instead of the usual 2, so I could not make as many pluses as I needed to make a good size comfort quilt. After laying it out, I folded some of the squares in half and put them on the edge. Liked the look, and cut some cream solids, and am making a piano key border using the squares I could not make a plus out of. Not sure of the corners yet- I will sew this up this week. Not my usual colors (reminds me too much of growing up in the 50s), but I love the fabric. 
First layout, dark plus too close to light plus which I changed.
Final layout but too small
With folded squares to see if border idea would work
Piano keys started, will make it big enough and uses the great fabric