Thursday, February 28, 2019

Fabric-a-poolosa!

      Whatever you call it, I had a fabric feast last week. A friend sent me a box of fabric for my comfort quilts and a guild friend had a downsizing sale due to a move. All the fabric in the box was washed and ironed (happy sigh). 
 
Great assortment of colors
Batiks over 10" in size
Bought from mover's stash

     After I put it away and was going through quilt tops as to what to quilt next (just finished the mystery quilt Alycia is doing), I found a top called Basketcase that I was not happy with because the precut Kaffe strips were cut poorly and I could not finish a last row. The quilt was 60 x 60 and I wanted it a tad bigger. 
     A lightbulb went off in my head about one of the Kaffe fabrics I had just put away from the box. Sure enough, it made a great border for the quilt. I was able to cut 3.5" unfinished strips and just make it. If I would have had more fabric, I would have mitred the corners. Now the quilt is 66" x 66" and I think a better comfort quilt size. I think some child will love it.

This is what was left over after cutting the border from the gifted fabric, not bad, huh?

Wednesday, February 27, 2019

Hanging Leaves in Winter

     It is very much winter here. Snowing right now and over the weekend we lost power for 17 hours due to high winds. My attention span has been short due to a lingering virus, neck pain, and weather disruptions so I concentrated on small projects. 
     I started this applique leaves piece way back in a quild retreat last March. I don't like tablerunners, so I made a wall hanging. We used fabric Modge Podge to stick the leaves down (my own leaf design) and I sort of graffiti sewed black lines on all the edges to hold them down. I used scraps to sew made fabric to connect the leaves. The border seemed to incorporate the colors and movement of the leaves.
      I find it real fun to quilt with perle cotton. My mother in law used to sew huge quilts with an X stitch using crochet thread to hold together polyester knit scraps on a backing, so it probably reminds me of those treasured quilts. Since my guild co-chair for program and I are presenting a borders and finishes program March 18th, I decided to make a faux piping binding. 
     I cut the dark blue 1 1/2" and the gray fabric 1 3/4". After sewing long strips of the dark blue and long strips of the grey, I seamed the two colors and then pressed in half. The gray extends over the fold. I glue basted the binding on the back of the quilt with the dark blue facing the quilt, gray side up, sewed 1/4".  Then I pressed, folded, glued again to the front and sewed in the ditch between the gray and the dark blue. All I have left is to put a sleeve on it and I just found the tutorial to do it by machine, which is what I will do.


Friday, February 22, 2019

Another one started

     I try to keep my mother occupied and she can sew straight seams at 1/4". She can't (won't) piece blocks. This means that I have to do a lot of cutting and matching before I give her something and trimming and sewing blocks and assembling afterwards. She blows through what I give her like a house on fire, and I am still struggling to finish the last project with other projects going on. I have two quilts web-ready for quilt retreat that she sewed the strips for. I have two quilts with HSTs made from layer cakes she sewed all around that I need to lay out. And she wants more to sew and I can't keep up, so she is bored right now. 
     A while ago, I did the 2 x 4 quilt with 3.5" strips. I layed it out after cutting her sewn strips and my sewn blocks. One ready to web.

      I looked through my batiks and cut 2.5" WOF strips, matching them up and giving her enough sets for a twin size quilt. She sewed them all in record time. Now I am subcutting them into pieces for blocks and putting them on the design wall. I hope to get all the blocks sewn and laid out on the wall, marked for webbing before the end of March quilt retreat. And do my other sewing/quilting.


Blocks done so far.

Wednesday, February 20, 2019

Mini quilts and Mystery

     First, for the Mystery! I designed a quilt for my guild as a Mystery Quilt with 7 clues. It was meant to teach them how to use values, break up putting a quilt together so it could be sewn between other quilts- picked up and put down without getting lost. and beginner quilter friendly. However, over half of the people dropped out. I spent hours writing, doing the illustrations in Word, copying, testing, etc. I have a profound respect for pattern writers. I have no desire to write another pattern. 
     One Mystery pattern writer that I admire and have made her quilts is Alycia who is a champion for QOV quilts. I noticed she has been real busy, and I offered her my mystery for her followers. She graciously accepted and it is a go. Go check her out. I have not posted any pictures of it on my blog, so it truly is a mystery.

     For Valentines, I made my grandkids mini quilts that I used decorative paper clips to hold onto the cards. If they want, they can save the quilts and hang them in their new bedrooms. Their addition started at Halloween and mostly ended yesterday. They have new bedrooms upstairs. My husband put wood floors in for them, the trim got painted, and the beds were set up yesterday. Thursday, the carpet in their work/play area will be done. 
     I used the polaroid quilt idea and heart fabric for the backing. I used felt for the batting because I find it makes it less floppy than regular batting. I would love to make a whole polaroid quilt. Or two.


Back of mini quilts

Thursday, February 14, 2019

Card inspired quilt sewn!

     I continued to press on finishing the quilt that my grandson designed on my get well card. After piecing and trimming, I pondered on the stars. Ethan helped me pick out fabric he thought would work. I drew stars on freezer paper, cut them out, ironed them to the fabric, and used what I learned from Karen Kay Buckley- Magic Sizing applied with a brush to the fabric, folded againt the freezer paper, and ironed flat. I had a few different size stars and went with the smallest ones I made. 

    After dusting off the vintage Bernina 830, using a 70/11 needle and monofilament from YLI in the top and bobbin, and the blind hem stitch, the stars were on. It sewed like a dream. I don't sew on it very often thinking I will break it. 

      When viewing it on the wall, it ocurred to me if I had applied what I learned from a David Taylor lecture in Houston, I would have remembered shadowing and lined the stars. Oh well, it can't ever be in judged show, but I am not ripping them out. 
     I found some big piece of hand dye for the backing, cut some Quilters Dream for the batting and will baste it all together to quilt on a beloved 301. I think it is too small for the long arm.

Tuesday, February 12, 2019

Close to Valentines!

     Long as I can remember, I have made cards. Can't say what motivates me- I just have to. The good thing is people like to get them. I have made Christmas and Valentine cards for almost 50 years (yikes). In grade school, I always made the classroom box and decorated it for everyone to put their cards in, trudging it to school a half a mile in February Buffalo weather. Gladly. I think my biggest complaint besides running out of time, is I can only make so many and I hit the wall. I try to keep up with birthdays as able.
     When you think of it, it is kind of like making quilts, but using paper so I guess I have following the same path longer than I think.
     Every year, I sketch and sketch fearing I have run out of ideas. So far, something emerges. This year, after many fruitless sketches, I drew and cut asymmetrical elongated felt hearts. 
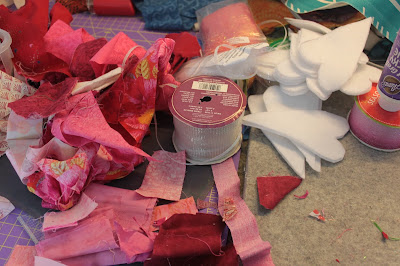
     Using a pile of red, pink, white scraps, I sewed them onto the felt with black thread (Singer 301). Sometimes I added ribbon scraps, broke down and bought some lace and iridescent novelty mesh. No fusible was harmed. Every one is different. Once sewn, I trimmed them.  I wanted some dimension and stability so after experimenting, I bought cotton duck in natural, cut a rough shape, stuffed leftover batting on top and layed the felt heart on top. I outlined the heart twice with the black thread and trimmed leaving some cotton duck showing. After a couple of hearts, I remembered I have an old set of pinking shears (made in USA) and trimmed the rest with those. The hand did not like it.
Felt hearts trimmed
Felt heart plus cotton duck stuffed, pinked

      I buy card blanks with envelopes from Joann's or Michael's when they are on sale in packs of 50. Using a Fiskars roller with hearts left over from art teaching days, I inked red hearts on the front of the card. The 3M tape gun adhered the hearts to the card front. I hit the wall at 54 unable to eek another one out.  
All paired up with envelopes addressed
Ready for Post Office
     I was able to print address labels, stamp, and get the out of town ones to the PO last week, and the local ones yesterday. Last year, after I mailed the out of town ones, I had a heart attack. I was a bit gun shy mailing those out this year, but it was fine. 
     Hope you enjoyed another card blitz!

Friday, February 8, 2019

The Bonus Year

      I think we are all familiar with the term "Bonus Triangles" which means the saving and using of pieces cut off stitch and flip blocks. In my case, I had a Bonus Year. Last February 7th, 2018, I experienced a severe, heart stopping, heart attack. Out of the blue. No normal heart attack symptons- just a stabbing pain in the throat. 
     Women many times do not have the normal symptoms. A high percentage of women never survive their first heart attack. I found that out when I signed up for cardiac rehab and asked why were so few women attending. Three times a week I do a hard workout for over an hour. Takes a chunk out of my day and I don't like it, but I am still here and stronger. 
     Please, if anything strikes you out of the blue and seems very strong and uncharacteristic, get help. I had no chest pain, shortness of breath, nausea, arm pain, or dizziness, etc. Just that knife edge pain. My town paramedics rescued me and Dr. Vijay Iyer from Gates Vascular Institute saved me via stents. I was spared by God for this past year. 
     When I was in the hospital, my then 7 year old grandson made me a card. He knows how much I love my vintage machines and quilting. This was the inside of the card, the side opposite his writing:
      You can see the whole card and the post with fabric that Vicki sent me not knowing the quilt on the card here
      Anyways, a year later, I had not started on the quilt because I was afraid to mess up, not knowing how to start, blah, blah, blah. Yesterday, I pinned all the fabric on the wall, added more hand dyes, and started with a loose plan. I was certain that if I started to draw it out on graph paper, I would lose momentum and have it look rather frozen. It doesn't have to be any particular size or fit, so I started cutting 2" strips. If sewed straight, it did not seem like a kid's design, so I had to figure out how to cut things a bit wonkier. Hard for me. I think I finally have it going well. Ethan drew four stars on it and I am debating how to handle that. I have to include them!
Laying it out
Getting it sewn
     The last photo to share is my hand. People have been posting hands lately. This photo shows the two incision marks that still show now from the two times I had to have the stents placed (4 days apart). 

     I look at it a lot and give thanks for the bonus year. Now if I could just get some serious quilting and painting progress going gangbusters, it would be even better.
     

Sunday, February 3, 2019

Figuring it out-finally

     A while back I finished a sunflower fabric OBW (one block wonder). I did not finish the zig zag sides because I was unsure how I wanted it to look. I had extra blocks that I could have added one piece at the end of the row, but they did not have a whole design and it seemed jarring to me. I couldn't make up my mind, so I sewed the entire quilt to get it off the wall and stop waffling. I knew I needed to add the triangles, but was unsure what to use.

     Later, I can across a blue batik that matched the patches of blue that were among some of the blocks. But I did not know how to cut and sew them in. After being inspired by Wanda's finish, just last week, it dawned on me that the edges were just two triangles that I had cut using a template, minus the center seam allowance. I took the template out and traced it on template plastic. I cut a sample diamond, marked the 1/4" seam allowance on two edges, dropped a pin where they met and matched it to the inside seam of the quilt edge. I realized that I did not need to cut the whole diamond, but just beyond the halfway point so I could trim it after.


     I sewed on the 1/4" line, when I got to the intersection, I just pivoted the fabric, easing it with a stiletto, and sewed to the outside edge. It was perfect (that does not happen too often). I continued to cut and mark all the side diamonds and sew them in. It was not that difficult. Why did it take so long for it to dawn on me?
     After trimming the side diamonds flush, I added a blue strip along the side and a wider one at the top. It is exactly what I was thinking. How about that? Of course it took months to think of it.