Wednesday, July 31, 2013

Denim Lily started

    When I visited Quilting by the Lake Tour Day, I saw a class by Hollis Chatelain, where she sews denim to a multicolor back fabric, quilts it, and then cuts the lines between pieces revealing the multicolor. I asked her if she had a book or video on it, but said I had to buy the pattern. I hate making an existing art pattern, but I bought it because I love denim, multicolor hand dyes, free motion quilting, and landscapes. I read it a number of times, but still am not real clear. I drew my own pattern from one of my photographs, bought some jeans at Amvets, washed and cut them up, and started. After I drew the pattern, I had to trace it in reverse and number the pieces. Then I had to trace it on freezer paper. I made sure instead of using just one color line, I drew hash lines in multiple colors to make sure I could  line up all the pieces. Thanks to a class with Pat Pauly, I was able to know to do that.
   Once the pieces were ironed to freezer paper and cut out, I had to zig zag them together side by side with invisible thread. Then all the pieces had to be zig zagged together. I used my wonderful Singer 401. The next part was awful. I had to take out the paper which of course was sewn in. In the process, a lot of the seams came apart. I would have to do that differently somehow next time. Then, I layered the denim, the multicolor hand dye, the batting and the backing together. She wrote not to spray baste, but I have no fingernails these days and could not do safety pins. So I spray basted. I thought I need to stabilize the piece, so I sewed straight stitch with invisible thread on top, Bottom Line on the bobbin around every edge at least 1/8" away from the raw zig zag edge to every piece. Now, I started to add the quilting lines and realize that I do not have enough colors, so I had to agonize deciding and place an order for some Isacord. I am waiting for the thread to continue. The pictures are my steps up to where I basted it all together. I will take some other pictures as I resume. By then, I will have calmed down from ripping paper and trying to understand the directions.
The Drawing

Reversed drawing with numbers

Pieces cut out and some sewed
Partly assembled

Sections together

Denim together pre-ripping paper


Monday, July 22, 2013

Bits and Pieces

   I am still working out in my head to proceed on a few quilts. I get ideas and see things, and then have to figure out how to use them.  When I piece, I use leader and ender fabric which Bonnie Hunter taught me on her blog. This way, I start with 2 squares and end with 2 squares and then make 4 patch leader and enders every time I sew. I have all these neat 4 patch blocks now as a bonus from regular piecing. So, now what to do with them? I made two Wonky Star blocks to try this out. I could make a some more star blocks and then a sash around them all, then 4 patches around maybe. I don't know.
     Bonnie Hunter is also working on 2.5 x 8.5" strips of paper and covering them with crumbs. Four strips make a block. I made two blocks. I don't know how the blocks would go together, sashing around? All of these scrap blocks are sewed on my Singer treadle. I keep a box of scraps on it, and do therapy sewing whenever I need it. I can just leave it on the machine. I don't like sewing on paper, but I am giving it a try.

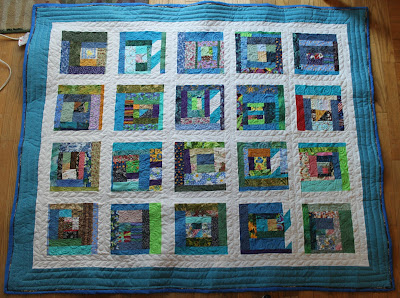
    The last crumbs I am working on is 6.5" blocks. I love using scraps. My thought is to make a number of blocks and maybe use attic windows to put them together. I don't always like using sashing around because it gets kind of boring and repetitive. The last crumb quilt I did for a comfort quilt had sashing. I thought maybe this might work- I have never sewn the attic window pattern, just this one block. What do you think?

One Attic Window Block


Finished Tops

   Finished sewing some quilt tops. The first is an idea from the Missouri Star Quilt Company, the 2 Dudes video- http://quiltingtutorials.com/all/amazing-jelly-roll-quilt-pattern-3-dudes/   Instead of 4 strips, I used 6 strips of varying width because I am using scraps and I taught my mother to sew the strips. I did not want her to worry about things matching, and she would. I cut the strips 13" varying from 2 1/4 to 3". After the 6 strips were sewn, I trimmed them to 12 1/2". One block was horizontal, the other laid on top vertical, sewn all around, then sliced diagonally to make the blocks. It has to have a backing and batting, but this will be a comfort quilt. It is about 52"x 60".
  

   The next quilt is one from McCalls quilt magazine, June/July 2012, called Split Decision. I bought the color fabrics from Vicki Welsh, Vicki Welsh hand dyed fabrics who helped me tremendously in getting the colors I wanted. I can't say enough good things about Vicki's work and service. If you want hand dyed fabric, give her a try. I took a class in to help make it, but most of it was done at home. I am very ambivalent about this quilt. I love the colors, but it looks alot like the photo in the magazine, which really annoys me. I hate to spend all the time on a quilt to make something that already existed. I will back and quilt it. Someone else will love it. I bought the magazine, so if you are dying to make this quilt, I will send it to you for postage.
Closeup of corner


   I probably should have put this Rainbow Quilt at the top, but I am embarrassed. I started it over 20 years ago because I was in love with a couple of Michael James books I have. This was before rotary cutters, etc. I traced cardboard templates and used scissors. After this quilt, I quit quilting for a long time. I never finished the quilting, which was done by hand. In the computer age, I developed carpal tunnel and quit handquilting. But, my wrist is ok now, and I finished the quilting. The wonderful ladies at Pine Grove Quilt Shop helped me pick out the fabric for the border which is a Kaffe Fassett. This quilt I love, the 20 year project.

     Another quilt I showed before, but did not know how to mount, is Tulip Garden. It will be at the Artsphere Gallery on Amherst St. in Buffalo in a show opening July 26th. I sewed a back on the Tulips, slashed a line in the back, turned it, pressed it. Then I made a 17' x 17" pocket that has a sleeve for hanging on the back and inserted a piece of heavy weight interfacing. This lets it hang even and now I can also put it in a quilt show in October. I handsewed the corners of the Tulips to the backing with invisible thread. Need a better solution,


Sunday, July 14, 2013

New Comfort Quilt Progress

   The Crumb quilt is totally finished. I just have to sew pockets on the tote bag. It is easier for me to buy the tote bags by the dozen and just put the pockets on. The blocks in the Crumb quilt are all from small scraps that I ask for and make myself. The crumb blocks were all sewn on my treadle. Quilted on a Singer 301. I just leave a pile of scraps on the treadle, and when I need some mindless sewing or have a small portion of time, I keep adding to them. I am working on another crumb quilt, but instead of sashing, I am going to try attic window edges.
  The other quilt is the exploding squares pattern that my mother helps with. She can sew all around a square. I press, cut, and put the third square on, she sews all around again. I press and cut and put them all together with the border. This time, I had my mother help to arrange the blocks. The pindot fabric for the border I had since the 80s. My mother's Brother is from when I was a baby in the 50s and it works fine although I just replaced the knee pedal for her. Now, I need to cut a king size batting into 4 so I have a batting for it. It is just hard to find somewhere to lay out the batting to cut it.
   These are comfort quilts that I bag with a book and card for cancer chemo patients when someone gives me a name or contact. Most of the time, I do not know the person or ever meet them but I know they get comfort from the quilts. I have all the pieces for another one, this time the idea is from the Missouri Star Quilt Company and their video on strips from the Three dudes quilting https://www.youtube.com/watch?v=L5Ixvjje310&feature=c4-overview&playnext=1&list=TLOsL0CnMnzuA. They use 4 strips in theirs, I used 6 so the blocks when cut diagonally are larger. I just have to sew the blocks together now. Post that soon.
   The Kenmore 158.1654 got its new spool pins and belt and is ready to go through the paces. The 1040 got its handwheel removed and cleaned so the clutch disengages and I can wind a bobbin.
  Still a host of projects staring me in the face.
I know the sides are wonky, I had to photograph it on the floor, standing on a chair.

Detail of corner, faux piping binding

Block and quilting closeup.

Exploding squares, needs backing, binding. Again, could not photograph wonky.

Tuesday, July 9, 2013

My new Kenmore 1040

Mold dots, dirt, but intact

Dirty, but unmarked

Ugly discoloring

All clean and put back together!

Discolor all gone!

All shiny, now can I get the bobbin winder to work? Can't get the handwheel off

Beautifully clean in design and finish

Cute, functional, compact, what is not to love?

No more mold!
    It did not take much coaxing from Elizabeth, mysewingmachineobsession.blogspot.com, for me to pursue a Kenmore 1040. I have a couple of 3/4 size Singers, a 99 and Spartan (turned that into a handcrank) and like the small size. The Kenmore can zig zag however. One came up on eBay and it turned out it was only about 10 miles from me, so I could pick it up and avoid shipping $$ and possible damage. When I got it home, there was the musty factor and a couple of dots of mold starting on the case and machine. Anything that was plastic, I threw in hot water with Spic and Span to soak. I wiped the whole machine down with rubbing alcohol and then swabbed everything, taking off everything I could. I oiled and greased, polished and reassembled. The machine got a coat of Turtle Wax and polished. It sews amazing. The case is so neat, compact and functional. I can take it to classes and anywhere! The plastic pouch that housed the foot pedal is all ripped, so I am not sure if I should make something for the pedal, or tape it up.
   On the quilting front, I finished the Black and White top I started in a class, but it was too dreary today to photograph it. My mom sewed a bunch of blocks for me, so now I can sew up two more comfort quilts. I was able to fix her old Brother by swapping a knee pedal/foot pedal from a Singer 401 I bought at a garage sale since I removed that machine from its cabinet. Now she won't get a bruise when she sews from the pedal. Quilt pics to come.

Thursday, July 4, 2013

More cleaning!

   A woman at church was moving into assisted living and when the helpers from church were moving things, they saved a sewing machine from going to the curb and gave it to me. It is a Kenmore 158.1654. I fixed a friend of mine's Kenmore once, but I usually fix just Singers as that is what I sew on. After I got it out of its cabinet, it was apparent it was pretty filthy and not used in many moons. It needs a new belt, (ordered), and spool pins (ordered) since the ones in there are sheared off inside the holes. Everything else seems ok. It did not even move at all when I first tried. I took off the cover and soaked the shaft at the wheel with Liquid Wrench and kept working it. The cam was sort of cemented in also. Lots of solvent, Tri-flow oil, and wiping, and everything moves like silk. I found some cams for it on ebay. I remembered to take some before pictures. This machine could use a good home. It is very sound and a workhorse. If I could find someone who wants to sew, I would drop it off with some instruction. Hopefully, some wanna-be quilter is pining for a machine.
  I can't wait to put all the new pieces on and try some stitching on it.
DIRTY TOP

STARTED CLEANING SO I COULD SEE THE DIRT

SOME GRIME REMOVED, SEE THE CONTRAST

JUST LIKE NEW

ALL WAXED UP, OH FOR THE SPOOL PINS!

LIKE NEW!

READY TO STITCH

EVEN THE BACKSIDE SHINES

New Baby Quilt

  This baby quilt is for a former student who just had a baby boy. I used a panel piece from Eric Carle in the center and sewed dark/light strips at the sides. I used some wonky star blocks that I had made as a trial to see if I could sew these after reading Gwen Marston's book and looking at tutorials on a couple of blogs. I love the wonky stars, but they are time consuming. I would love a whole quilt of them, but I don't know if I have the patience for all those little blocks. I wanted the quilt to be rectangular so I used a piano key border, sewing longer strips in multiples, then cutting to the 61/2" length and sewing the multiples together. I love the colors and sparkle. I certainly hope the mom and baby feel the same way. This was quilted with Superior So Fine 40 variegated thread. I had mucho tension problems with it. After this quilt, I switched back to Isacord and no issues on the next quilt. No matter how I adjusted top and bottom, changed needles, no consistent good stitiches. This was pieced on one Singer 301 and quilted on another.
The Full Quilt

The Center Eric Carle Panel

The Center with the Wonky Stars
Detail of quilting