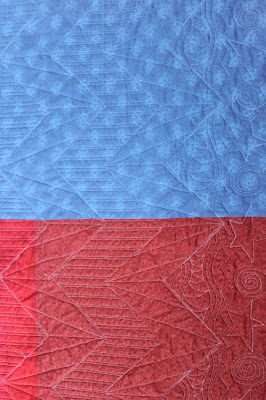
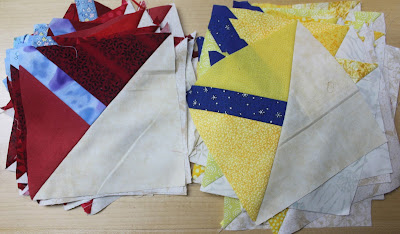
I made this string quilt a while ago, but it has been sitting on a hanger waiting to be quilted. My grandson asked me for a quilt for his uncle Greg who is a veteran and coming to a Veteran Day Assembly at his grade school. Ethan chose this one and I quilted it in sort of a no nonsense, not fussy patterns.
The backing needed piecing because I wanted to stay with the RWB theme. I tried a bunch of layouts on my kitchen floor and sewed it up. I could not get any glamour shots because of the weather, so I will try for one outside when it improves. Sorry for the blurry front.
Monday, October 30, 2017
Wednesday, October 25, 2017
Love the indigo, but...
I have a good friend who is a quilter and a former art teacher, like me. We are program co-chairs for our quilt guild. She has been wanting to indigo dye some fabric. Me, I would rather buy it from a dyer like Vicki. She bought a kit and white fabric and told me I needed to do it so we could share our experience with our guild. I stalled all summer and, finally, acquiesced last week. We bundled, clamped, rubber banded, etc. yards of Kona white ppd. We followed the directions and it is quite a miracle how yellow green water makes indigo when you pull the fabric out.
I am sharing some of the photos here as I tried to document what we did, but wet gloves and hurrying got them out of order. I did not include the too much white ones. Our biggest issue: folded fabric doesn't let the dye penetrate enough. We did not want much white fabric left. We wanted more indigo color. Elizabeth also stitched some designs, and they did not show up well. I loved the wine bottle shiboris. One I wrapped horizontally and scrunched down and the other, on a diagonal.
So, okay, here is the rub: How do I cut these up for quilting without losing the designs? I am not making a quilt out of these as panels. Big HSTs? Just squares. I don't know. I do love the indigo color but I am wondering if using indigo color fiber reactive dye might work better. I think if I can get past the how do I use it, I might make- or rather buy- more indigo dyed fabric.
 |
| Diagonal wrap on bottle |
 |
| Horizontal wrap on bottle |
Tuesday, October 24, 2017
A surprise tree of life
A woman in my Sunday Bible class, brought me a top she found in her recently deceased mom's trunk. She had no idea who made it, but she thinks someone in her family. I have known the woman for a long time, so I said I would quilt it for her mom's sake. I hardly ever quilt for anyone.
When I got home, I took it outside to air and was delighted to see the beautiful tree of life in indigo fabrics (love, love indigo). It is all handsewn, but has a few small holes in the red and a few in the blue. Have to figure out how to mend it before I load it on the long arm. If I could find some Invisifil thread, the quilting would just add texture not color. I think I will use an unbleached muslin backing or a bone color Kona.
When I got home, I took it outside to air and was delighted to see the beautiful tree of life in indigo fabrics (love, love indigo). It is all handsewn, but has a few small holes in the red and a few in the blue. Have to figure out how to mend it before I load it on the long arm. If I could find some Invisifil thread, the quilting would just add texture not color. I think I will use an unbleached muslin backing or a bone color Kona.
Saturday, October 21, 2017
Two for further progress
The two quilts I worked on in Bonnie Hunter's workshops are nowhere near finished. I did get all 20 blocks for Pineapple Blossom done, but I have decided to add sashing. I was going to make it bigger using 36 blocks, but I think I just want it done.
Not as much progress on Texas Braid as the pieces are smaller and not as much chain sewing. We did sew two of the same facing rows as leader/enders and then after lunch alternated sewing the other facing row ones. Just takes longer.
Someone for show and share brought these two Scrappy Trips, big and small, that I absolutely fell in love with- still after a week!
 |
| Just blocks |
 |
| Needs cornerstones (neutrals) |
Someone for show and share brought these two Scrappy Trips, big and small, that I absolutely fell in love with- still after a week!
Tuesday, October 17, 2017
Inspired, tired and cleaning up
The Bonnie Hunter workshops in Rochester through the Genesee Valley Quilt Guild were awesome. Bonnie was personal, helpful, encouraging and moved everyone up on their game. She does not stop moving and has lots of energy.
Part of the workshop includes show and share after lunch. People bring in Bonnie tops or vintage or whatever. I knew no one in any of the workshops, but learned a lot from them.
I don't do selfies or stuff like that because I don't like pictures of myself, but I just had to have a picture with Bonnie as she means so much to me!
One workshop was Pineapple Blossom and the other Texas Braid. Bonnie always has everyone put of all their work together at the end and see how much was done. Kind of impressive.
The second day, over 13 vintage machines showed up (out of 33 participants). My favorite, that I had never seen in the metal, was Verna's 404. She showed me her notebook where she catalogs her machines. I was impressed with her documentation.
If you go to the link https://www.youtube.com/watch?v=q2uTaywYlfM, in the first 4 seconds, you will see my 301 and blocks. Bonnie's blogposts show a lot about the workshops.
Some of the show and shares included a beautiful large Lozenge quilt by Norma and a vintage quilt she found at a thrift store.
All sorts of braids were made, like this Christmas braid.
One woman did not make the workshop block, but Mad City Momma from the workshop book, using the Shweshwe fabric she bought at the Canada Quilt Show. She could not bear to cut it up small, so she used it as the block centers.
Next post will have the blocks I made, enough for now.
Monday, October 16, 2017
Not quite Sapphire stars yet
The last couple clues from Kevin came fast and furious and were fussy clues. For now, I assembled one block and got all the other pieces ready. I have to change the color of sashing and redesign the outer border so it will be continuous, and thus, it has been a slow process.
Thursday, October 12, 2017
Off to see the Queen (of scraps)!
After months of waiting and wrangling, I am packed to leave for 2 Bonnie Hunter workshops in Rochester, NY, about 1 1/2 hrs. from here. I do not like packing, so it is always difficult getting ready. I had to cut fabric for the patterns and hope I have enough. I never know how much extra fabric to take. I hope to learn to work better, see Bonnie who is such an inspiration to me, and look forward to seeing what others are working on. I am so excited!
Looking in the garden after I packed, these mums come back every year- the only ones that have no matter how hard I try with other ones. They are over 8 years old.
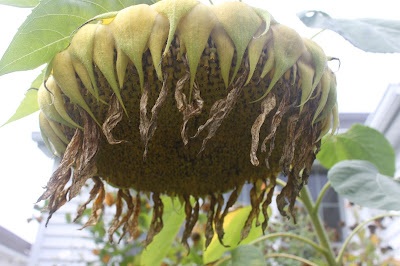
There are still some gorgeous coneflowers blooming and the one big sunflower is now a seed head. I have to take it down before the maniac squirrels get it.
Looking in the garden after I packed, these mums come back every year- the only ones that have no matter how hard I try with other ones. They are over 8 years old.
 |
| Aren't the shapes just awesome? |
Wednesday, October 11, 2017
Scrappy Super Zig
Another quilt I made for the Easy Scrappy Quilt Presentation coming up is Super Zig by thehappyzombie.com. It is a free pattern that uses pieces 4 1/2" x 8 1/2". However, I wanted to show how to use scraps, especially 5" wide strips cut from scraps. Once I cut the length I needed (3 pieces x 8 1/2" long- 25 1/2") from a 5" strip, I cut the width of the pieces to the required 4 1/2" so the remainder of the 5" wide strip could be cut into 5" squares making more precut squares for the next quilt. I will show them how to choose scraps that will read well together. If I had more time, I would have used scrappy creams and whites for the backgrounds.
 |
| Stacks of all cut scraps by color |
 |
| Blocks pinned in place |
 |
| Rows sewn |
 |
| All sewn |
Monday, October 9, 2017
A twist on Disappearing Nine Patch.
In a couple weeks, I have to give a program at my guild called "Easy Scrappy Quilts" and talk about making precuts from scrap fabric, storing them, and turning them into quilts. One pattern that I revisited was the disappearing nine patch, but added sashing to the blocks. I got the pattern idea from a pattern on Interweave by Lisa Swenson Ruble called Disappearing Nine Patch. I made the quilt with 12 blocks instead of 20 (3 x 4) because it will be a comfort quilt for a child. I will show this quilt in my presentation. Yes, I made a big mistake in orienting the animals. I arrranged them like I would for a regular Dis9Patch, but they stay in the same orientation in this block.
 |
| Making the blocks |
 |
| With sashing |
Saturday, October 7, 2017
Stick a pin in it
In honor of my new sewing machine and a pincushion challenge from my guild, I built a sewing machine pincushion. It won third place. I am using this one and it is next to my Singer 301 loaded up.
Subscribe to:
Comments (Atom)


